Saturday, January 18, 2014

New Quilt Project - Red, White and Blue Quilt

I love red, white and blue quilts.  I picked up The Quilter Magazine last week, the February/March 2014 issue and gazed upon a lovely star quilt that I would love to make.  The quilt is called "Simply Stellar."  About the same time I noticed that the Fat Quarter Shop was advertising the same quilt.  In Kimberly Jolly's blog she mentioned that you can purchase the fabric from her but you had to purchase the magazine separately.  Kimberly publishes patterns under the name of It's Sew Emma.  If you are interested in making this quilt with the colors that Kimberly is using, you can order it from her website:  www.fatquartershop.com.


I love sawtooth stars blocks.  I really had to do this quilt in red, white and blue.


This is the entire quilt.  It is so beautiful!  

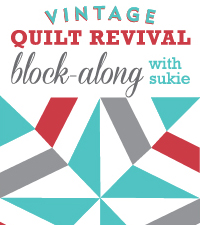
I am planning on leaving the design of the quilt the same except I will use red fabric in place of the aqua/turquoise fabric.


These are the fabrics that I have chosen to use in my quilt.  I have two navy fabrics because I don't think that I have enough of each of the fabrics to finish the quilt.  I will use the one for the stars in the middle of the quilt and use the other for the stars in the border.

I am starting tonight.  I will keep my fingers crossed that I have enough fabric for the blue stars.


I can't help myself, I had to put these photos of Joe Montana's jersey.
Go 49ers! It will be hard hitting but exciting game tomorrow in Seattle!


Thursday, January 16, 2014

Finally finished the Chevron Quilt!

I finally finished the Chevron Quilt today.  I was initially waylaid by my oldest daughter.  She asked me if I had a certain charm pack that we purchased together several months ago.  I looked around and could not find it but I found other fat quarters that would fit with the fabrics that she had.  What waylaid me was my own stash.  It needed to be "tweaked."  By that I mean, that I needed to organize it a bit better so I put aside the Chevron Quilt and worked on making my stash easier to get into and find fabric.


I need to find a backing fabric.  I think I will try to do the quilting myself.  I will let you know what I decide.

Sunday, January 12, 2014

"Charming Chevrons" - Finished the Blocks!

I finally finished the blocks of the "Charming Chevrons" Quilt...all 42 of them.  Now I just have to decide where to place all of the blocks and I can sew them all together!


They were fun to sew.  I really enjoyed working with the Kona Solid colors.  I never really worked with them before.


I will post more pictures when I am done. 

Wednesday, January 8, 2014

Great Sale at the Fat Quarter Shop on Fig Tree Fabrics and the Vintage Quilt Revival Book

There is a great sale at the Fat Quarter Shop.  The Vintage Quilt Revival Book that I blogged about a couple of days ago is on sale.  It is 20% off for remainder of the month of January.  It is regularly $27.95, but is now selling at $22.36.  This is a great bargain for a great book.


The other sale at the Fat Quarter Shop are Fig Tree Fabrics!  I just finished my "Little Lollies" quilt that was from a Fig Tree Pattern.  Joanna's fabrics are so yummy.  Here is a way to obtain some of these yummy fabrics at a 50% discount but you have to use the code:  FIGTREE in order to receive the discount at checkout!  The sale lasts until January 12.

The Lollipop pattern that I used last week.

New Quilt: Charming Chevrons - Designed by Christa Watson


I purchased a quilt kit from Christa Watson of ChristaQuilts.comI purchased the kit several months ago but I haven’t had the opportunity to put it together until now.  The quilt is so stunning that it was published on the front cover of "Quilty" Magazine, the November/December 2013 issue.


The kit includes two Charm Packs (42 in each) 5-inch squares of solids, two Charm Packs (42 in each) 5-inch squares of light background and 1/2 yard fabric for binding.  3 additional yards of backing and a 52" x 60" piece of batting are needed to complete the quilt that you will have to purchase yourself.


To make the quilt, the directions are as follows:


Place one dark solid and one background, RST (right sides together).  Mark from one corner to the other with any ruler and sew 1/4" on either side of the line or use a ruler that is similar to the "Quilters Magic Wand" from www.studio180design.net. 


"The Quilters Magic Wand" is 1/2" wide and has a line down the middle.  You place the line at two of the corners and use a pen or pencil to draw a line on each side of the ruler.  It is far easier for me to just sew on a line that is already marked.

The background squares were smaller than the dark squares so I just placed it as close as I could to the middle of the non-background square. 


Just make a cut between the sewing lines with your ruler on both corners. 


I opened both pieces and you will have two HST (half square triangles), iron them open, half pressed toward the light/background fabrics and the other half to the non-background fabrics. Each pair made will be ironed in the same direction.


I made a total of 84 HST's.  I like this method of making the HST because you have a larger square and you can trim them down to 4 1/2" squares easily and they will be close to accurate, as long you are accurate when you trim them.


This is the placement of the HST to make each chevron.


I sewed the tops together because I could butt the seams together.  I get a very accurate seam that meets almost perfectly at 1/4 inches.

The two bottom pieces go together just as easily. This is why half of the seams are ironed towards the background and the other half to the solid.


I ironed both seams open because there was quite a lot of bulk in the middles of the block where all four seams meet.

I sewed the top and bottom together and also ironed the seam open.  I know that it takes more time to do this but it is so worth the trouble when your block lays flat.


I will post more photographs of the chevrons as I sew more today.

Sunday, January 5, 2014

Vintage Quilt Revival Block-Along


I have been reading a new quilt book called, "Vintage Quilt Revival" by Katie Clark Blakesley, Lee Heinrich and Faith Jones.  I read all three of their blogs:  BikeSwimQuilt.com (Blakesley), FreshlyPieced.com (Heinrich) and FreshLemonsQuilts.com (Jones). They are modern quilt makers and new authors.  I received my copy a couple of weeks ago.


This book takes twenty traditional quilt blocks and changes  them into modern looking blocks.  The use of color, size and contemporary settings of the blocks also add to the modern feel.  I enjoyed reading the book.

You can order the book from Amazon, Fat Quarter Shop and the Interweave store.


Vintage Quilt Revival Block Along 
Lee Heinrich announced on her blog that one of her friends, Sukie will host the Vintage Quilt Revival Block-Along.  Her blog can be located at sukiedontyaknow.comSukie will make two blocks each week starting January 21.  I signed up to receive her blog posts so I would not miss any part of the Block-Along.  I can't wait to start but I always have a difficult time deciding which fabrics to use.  I hope that you will join in because it really looks like it will be fun!


I just want to add that I am a traditional quilt maker.   I have quite a bit of 1800's fabric but I am trying to switch to modern quilt making because the colors intrigue me and the settings of the blocks on the quilts look so great!  This is a way for many of you who are looking for alternative quilting methods to try it and see if you like sewing modern quilts.  Thanks, Sukie for hosting the block-along!


Saturday, January 4, 2014

"Little Lollies" Quilt Top is finished.

The quilt top is finally finished.  The holidays really made me fall behind so I am very happy to have finished the top.  I will bring the quilt, backing and batting to my quilter.  I am looking forward to seeing it quilted and ready to use.

Here is the quilt in progress:


Just the blocks assembled with the corner stones and sashing.


The inner border of the aqua and red to make it look scrappy.


A 3 1/2" white outer border added to frame the quilt.